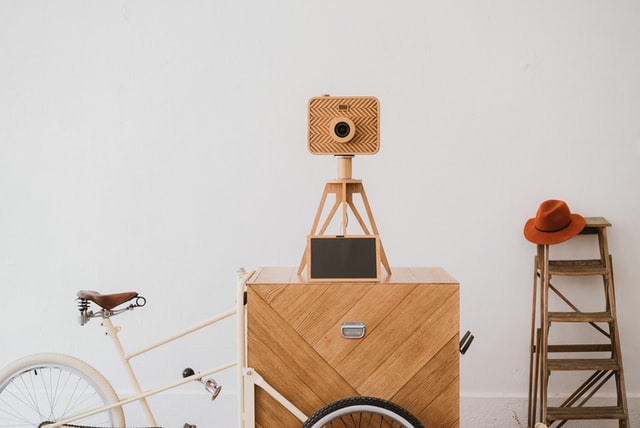
This GIF Photobooth sparks creativity, as you can encourage the guests to let loose, show their talent, have fun and you all can enjoy and make your day special. GIF has no sound and is low-quality, but give us joy. GIFs can add nostalgia and humor to your experience. GIF also nowadays are trending. Just press the button and do your thing.
What is a GIF Photobooth?
They don’t have sound but vibes and give us a lot of joy. According to Wikipedia, a Photobooth is a modern kiosk that contains an automated, usually coin-operated, camera and film processor. And a GIF photo booth creates a fun-filled, moving image. It can take looping pictures or short videos called boomerangs.
So, if you want your special day to more fun-filled and interesting. Then you must hire/book the GIF photo booth services for you and your guests. But if you are looking to make it by yourself then I can help you with that too. As I’m here with the do it yourself steps. So, here is the way to create a GIF Photobooth in 5 steps:
1) Try and find a beautiful set up for your Photobooth
Arrange and decorate the place as per the party theme. It could be anywhere in your garden area, dance floor, or anywhere in the front where people could easily find out. Also, focus on the backdrop. Remember your photos will look better when you beautify your backdrop to an extent that it adds more color and liveliness to the Photobooth. You may add lightening items that provide lots of natural light or request lighting to be provided by your photographer. You may light up lamps, candles, balloons, ribbons for decoration.
Now you have to get your GIF Photobooth prop ready. The props may include hat, ribbons, and glasses anything that your guests may like. You may also purchase it from amazon.
2) Material Requirements
The material you require for making your own Photobooth include:
- Camera,
- starter kit,
- thumb drive,
- LCD screen,
- HDMI cable,
- USB extension port,
- keyboard,
- mouse,
- power adapter,
- power jacks,
- bolts,
- panels,
- aluminum bars,
- and tripod.
You will have to cut the acrylic through laser cut it would be easy. Line up the aluminum bars along the top and bottom edge of the panel. Drill all the center markings with #7 drill bits. Thread the holes perpendicular to one of the sides with three holes on it. Now you can attach the back panel to the aluminum bars. Thread the four holes on the acrylic back panel. Now you can mount the LCD screen to the center of the back panel. After that line up 1/4″ front plate on the top the assembly. You can now mark the three equally spaced mounting holes on the front panel onto the aluminum bar with a transfer punch. Free the aluminum bar from the acrylic panels. You have to drill the new markings on the aluminum bar with a #35 drill bit. And thread them using a drill bit. Make sure countersunk holes are facing down. Just line up the aluminum bars with the mounting holes and fasten them in place. Peel the coating of the back panel. Now you can mount the electronics. Mount the power jack, and USB jack. Attach the power convertor with bolts, Raspberry Pi to the back panel. Plug cables, connect the jack. Wire plug, a power jack, connect USB plug. Mount the camera, attach back panel. Peel the cover. Attach switches. Plugin everything. Now you are almost ready.
3) Positioning
After that, just set up the tripod stand. Add the fabric. After that, you can slide tripod legs into the pockets of fabrics. Attach the monitor, slid into the hole and tightened the lock. Touch the screen to start.
4) Here goes the Pouts
Now simply stand in front of a monitor and strike some of the 3- 4 best poses, and your images are looped together to create animated graphics. You can even go unconventional and capture 7-8 shots to create a small video or long photobooth for promotional purposes. Leverage the best of pictures using GIF photobooths to promote your business over social media and blogs.
5) Editing Online
You even can choose to print image photo collage, email it or share GIFs instantly online through your social media accounts.
With the use of good LED light and beautiful design you can ensure it enhances the appearance in the videos. GIF photo booth is easy to make. It is a new concept in Social events in the field of photography. So, it’s the right time to say our goodbyes to still photography and say hello to an animated GIF photo booth. Because of its shareable link through text, email, and social media, it makes it easier to work with. Simply sign up, set up, and invite others to the event by importing your guest list. It can simply play with your minds and can bring out the best in you. Just click it, print it and share it, isn’t it’s great.
However there are some online tools even that can help in making online Photobooth. The following software that are standalone photo booth template makers or have the built in functionality that allows you to create photo booth templates:
- Darkroom booth
- PicMonkey
- PicPix.Inc.
- Dslrbooth
- Sparkbooth
The above mentioned online Photobooth maker is most beautiful and easiest to use photo booth software available. Well from my experience I would suggest you to go for dslrBooth, if the online photo booth template maker is your highest priority. So, if you are not having any graphic experience. No problem, you can jump in right away and start making photo booth templates directly from the photo booth software.


